Pages

Saturday, November 13, 2010

Quickie Child's Apron

For the child who wants to help out in the kitchen or dress up, here's a tutorial on how to quickly make a child's apron.  An old pillowcase can be repurposed and made into a cute apron. This craft project required only a little sewing and the finished apron looks like this.

Quickie Pillowcase Apron
Step 1:
You will need to gather an old pillowcase, sew a strap for the waist and two smaller shoulder straps to go around the neck. You can use ribbons, cords or sew your own straps.
Step 2:
Sew the shorter straps onto the top corners of the pillowcase (on the seamed side not on the open side where you would slide your pillow into the case).  These are the neck straps.  For the waist strap, stitch the longer piece onto the pillowcase - just enough so it holds the waist strap into place.  The waist strap should be placed closer towards the top because you need room for pockets.

Adding straps onto the pillowcase.
 Step 3:
Fold the bottom of the pillowcase up to make pockets.  Pin into place then sew the edges to make the pocket.  Sew two straight stitches up through the big pocket  (like shown in the image below).  This will keep your pocket from drooping while creating handy pocket dividers.  By using the opened side of the pillowcase (rather than the seamed side) to make the pockets, you'll notice that compartments have doubled for more pocket space.  Decorate, embellish...have fun.

Your repurposed pillowcase - now an apron!
You've completed your child size apron made from an old pillowcase!

I added one of my frayed flowers by the shoulder. 

You'll notice that the apron has a loose, cowl neck fit around the neck.  If you would like a tigher fit, just knot the corners by the shoulder straps.

Another collar variation would be to sew a panel at the top where you could make a drawstring collar that would gather around your neck.

This apron would be a great gift if you use a pretty pillowcase.  You could add a recipe in the pocket along with fun kitchen tools.

I hope enjoyed this easy craft tutorial!

Ongoing giveaway contest. Submit an entry.
***

Friday, November 12, 2010

Friendship Friday

What is the best thing that happened to you this week?

I made a new friend.  While doing what I normally do in my day, I met a mom and instantly we realized that we had a lot in common.  We decided to get together and chat...Starbucks Coffee, an Oat Cake and great conversation.  I'm glad there are so many nice people in this world!

Leilani at the Movies
Speaking of nice people, I was very, very suprised when I received a box in the mail from Joy from the Joy of Crafting blog.  My family hosted Flat Leilani during the summer as part of a JOC project.  We were already rewarded by bringing Leilani around on our activities but Joy also sent me these goodies.
Cute Stickers

Little Bird Project Book

Stamps, Ribbons and Photo Frame to Decorate

Colored Masking Tape

Bead Storage Box and Creative Captions

Have a wonderful weekend and thank you so much!

Current giveaway link: Enter to win!

Wednesday, November 10, 2010

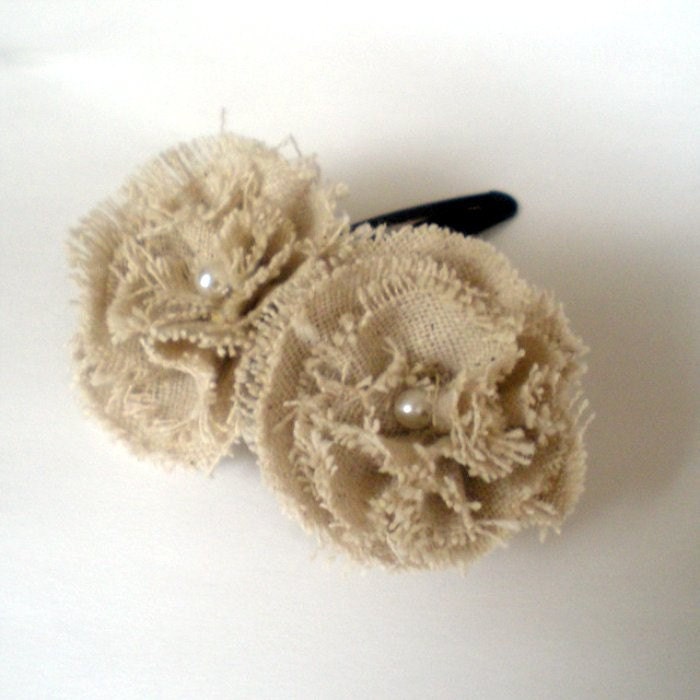
Frayed Flowers Tutorial

I have this frayed flower listed on Etsy but you can make your own in just a few steps.

Frayed Flowers Hair Clip
  1. Using a cup as a template, I traced the rim on my fabric.
  2. I cut it out.
  3. By freehand, I cut the fabric in a continuing spiral pattern - thicker on the outer ring and getting smaller as you near the center. 
  4. Using a straight stitch, sew the spiral near the edges where you just cut. I started from the inside and moved out.
  5. Gather along the stitch and arrange into a flower pattern.
  6. Sew a bead or button in the center of the flower.
  7. Finally, using a glue gun, I glued the flower to the snap pin.  (Make sure your flower does not fray from the center out by making sure you glue close to the edge where you sewed.)
All done.

Remember to enter the Spiral Rope Bracelet Giveaway!
Related Posts Plugin for WordPress, Blogger...